How to Export FX Sequences from Unreal Engine 5
Nov 30, 2022
Learn how to export PNG sequences from Unreal Engine and convert them to video files so you can show off your FX in your demo reel, on ArtStation, and all over social media.
Let's talk about Exporting footage from Unreal Engine 5. This is a common question we receive quite a bit because people want to put their portfolios together while maximizing the quality of their work. So let's talk about it, step by step!
In this tutorial, Omid Kiarostami will be using Unreal Engine 5 and DaVinci Resolve for the exporting process. Don’t worry - Resolve has a free trial that's more than capable of getting the job done. If you want to download Resolve, click here.
When we’re done, you’ll have a sequence that you can scrub through to show off the effect you created. You can render it out to a PNG sequence and then turn that sequence into a MOV file that you can upload to social media or your website. Let's check out the tutorial!
Interested in learning more about real-time FX, concept art, and animated FX? Check out our in-depth FX courses. Learn from FX artists working on the biggest video games and animated series.
1. Create a Sequence to Export
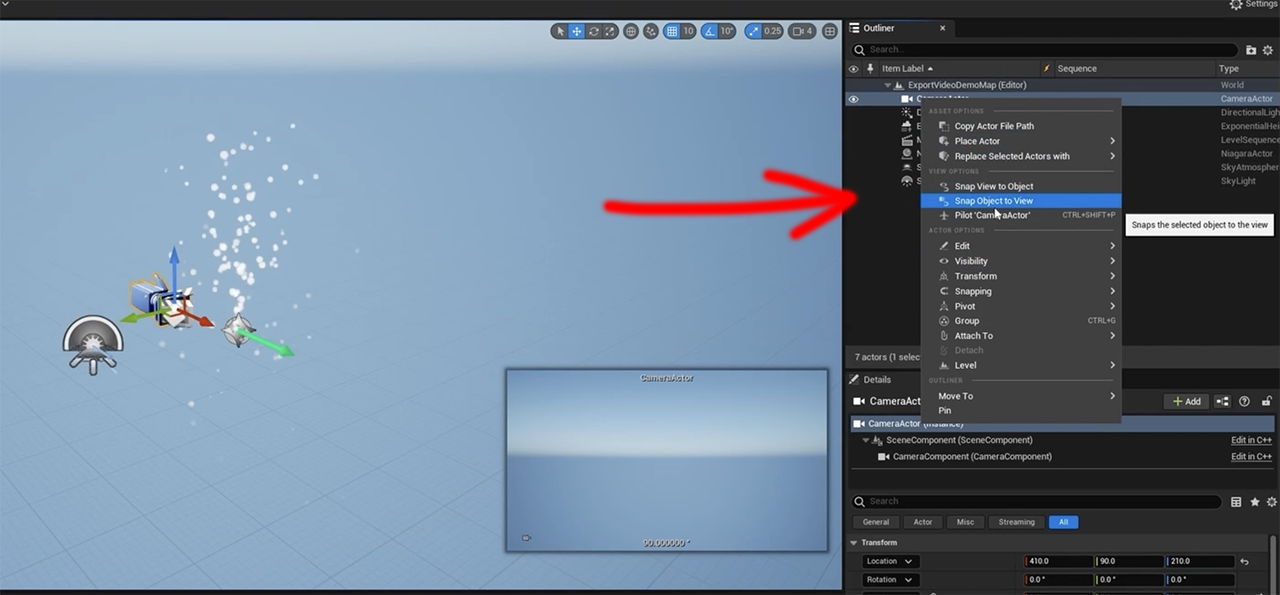
To start we need to add a sequence. Go up to the film slate icon and hit Add Level Sequence. Next, add a camera to your scene, then right-click on the camera and hit Snap Object to View this will give you a preview for what the effect is going to look like. Drag your camera down into the sequencer track down in the bottom.
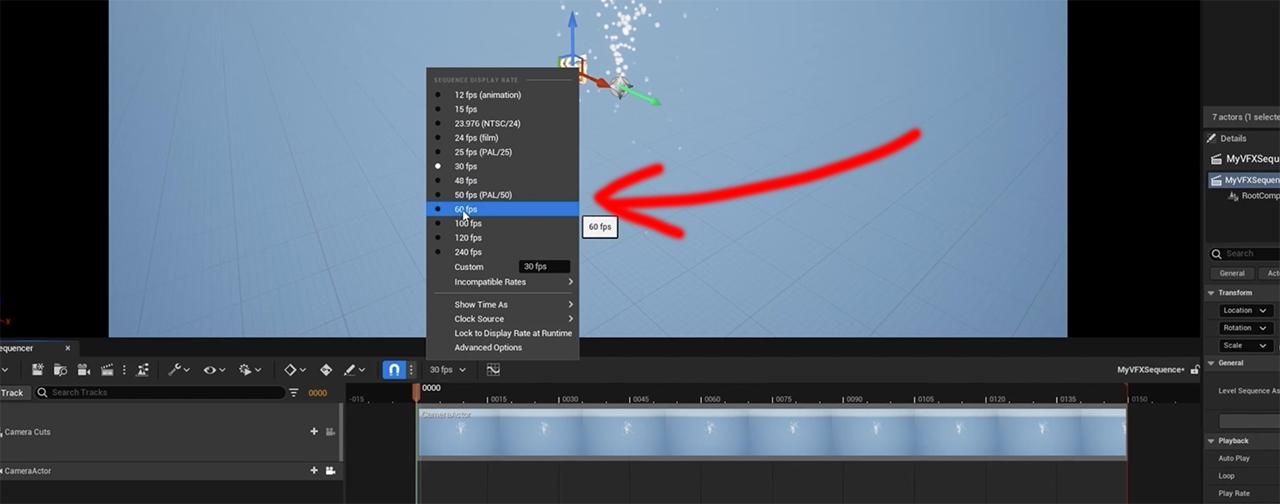
So to kick things off, let’s set the frame rate of the sequence to 60 fps. Keep in mind once you change the frames-per-second, the overall time of the effect will change so be aware of this change for your final export.
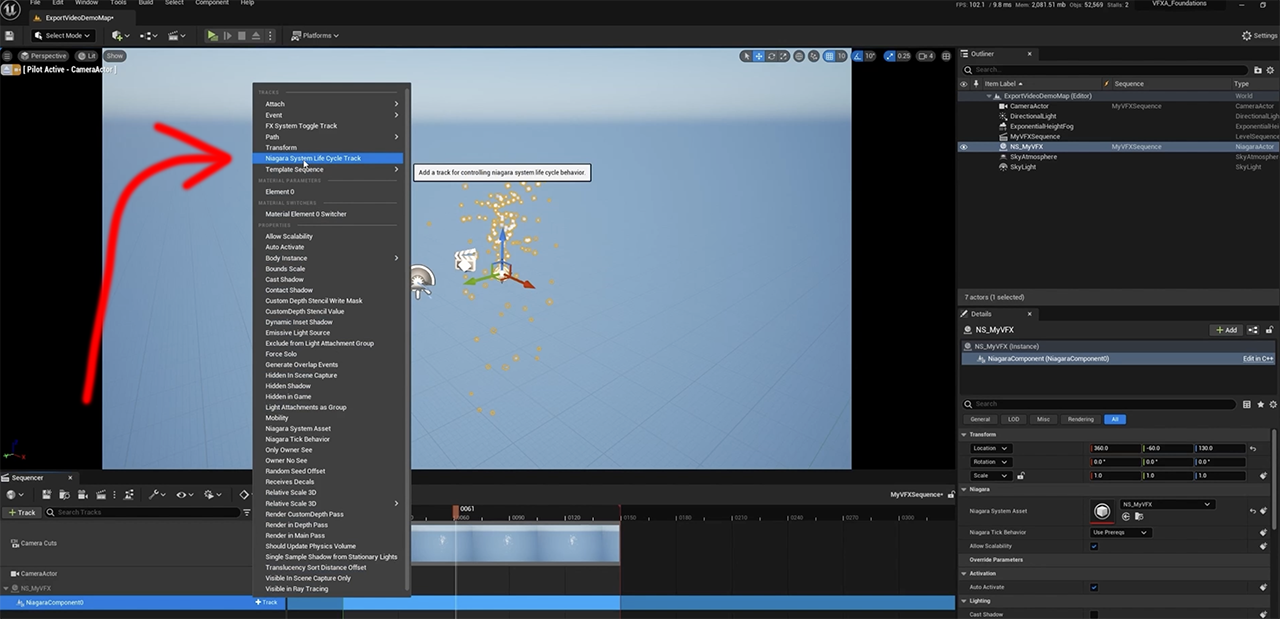
Drag your effect into the sequencer click track and add the Niagara component, click Track and then add Niagara System Life Cycle Track. You can now right-click on the track that has been added in and if you got to Properties, there's an Age Update Mode > Desired Age.
You will find that you can now scrub through the sequence and pause wherever. This can be used to inform the beginning, middle and end of your sequence (if in fact there is a clear beginning, middle, and end).
2. Choose Your Render Settings
Okay moving on! Click on the Rendering button. Now we’re going to tweak the Render settings. First, change your Image Output Format to Image Sequence (png). Then scroll down to General > Output Directory and change the location to wherever you need it to end up.
Then be sure to change the Filename Format (directly underneath the last option) to whatever filename helps you stay organized. This step is entirely up to you as everyone's filing structure and system is different.

Next, be sure to expand the Advanced category and click Overwrite Existing and then scroll down to the bottom and change the Delay Warm Up to ‘1’. From here you’re pretty much good to go. Give it a test render!
3. Convert PNG Sequence to MOV with DaVinci Resolve
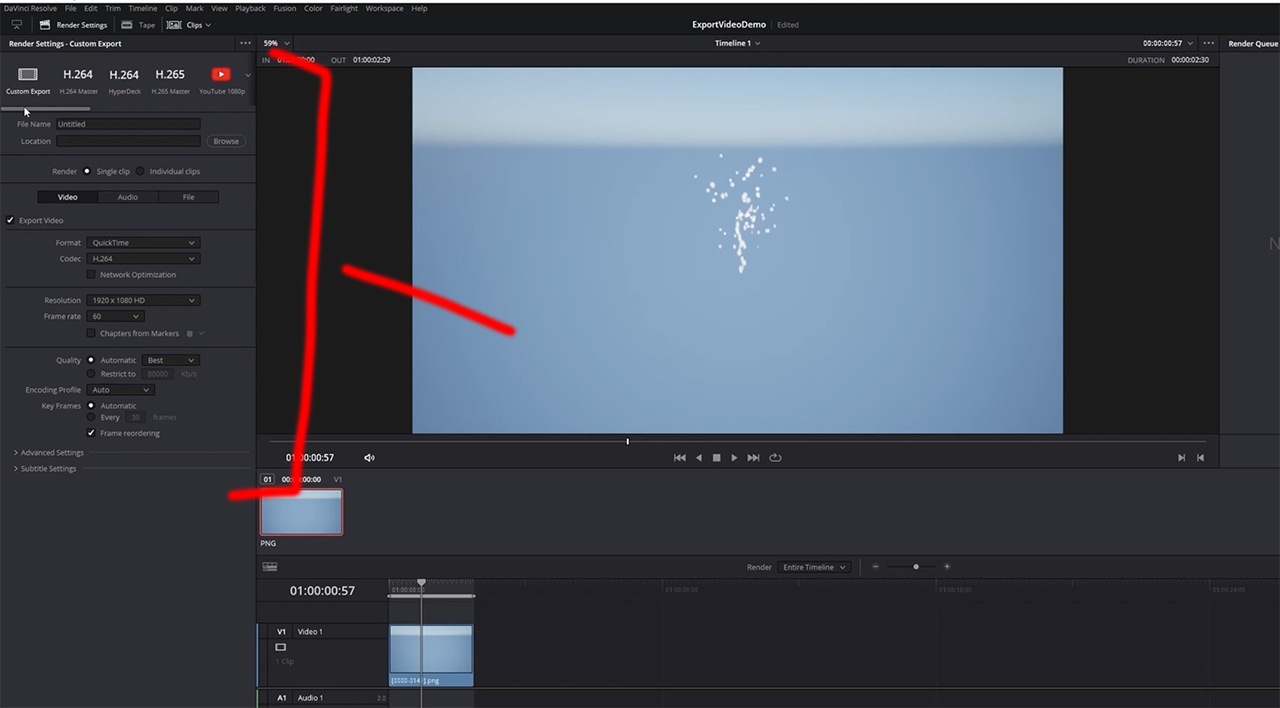
From here we’re going to open up DaVinci Resolve. To begin we’re going to set up the Project Settings like the Resolution and Frame Rate. Go to File > Project Settings and from here you can change your frame rate to 60fps (if you want) and hit Save. Next, go to the Edit tab on the bottom of the page. Drag your Rendered effect into the timeline.

Next go to the Deliver page down on the bottom. You’ll see the different formats capable of exporting to, whether it be H.264, H.265, YouTube 1080, it really doesn’t matter - its up to you!
From here, you just choose the location to save the project to and name it as you please. Hit Add to Render Queue and then go to the right side of the screen and hit Render All. Voila! You have your project rendered and ready to post or publish however you’d like.
If this tutorial was helpful, consider checking out the rest of our blog and YouTube channel. No matter if you're just starting your VFX journey or a seasoned veteran - there's something for everybody.
VFX-A ALL ACCESS
All Access is a new subscription offering from VFX Apprentice. The annual or monthly plans include all 2D, 3D, and real-time FX courses, all upcoming new lessons and courses, livestreams and hangouts, Unreal and Unity sandboxes, all Discord community channels, and members-only perks.
Start Your VFX Apprenticeship
Begin your journey towards mastering FX for games and animation. Join VFX-A All Access and discover cutting-edge 2D, 3D, and real-time FX training.