Everything You Need to Know About Installing and Setting Up Unity
Dec 14, 2022
You downloaded Unity. Now what?
Here are some tips and best practices for your Unity projects and preferences to set yourself up for success.
When it comes to working with real-time game engines, there are two popular options, Unreal Engine and Unity. In this tutorial, we are going to look at installing and setting up Unity. This will cover everything you need to know or expect when first starting out with the program.
If you want to check out Unreal Engine, we have a free intro series here on the VFX Apprentice blog.
Our lead technical artist, Sandra Femenía, walks us through the initial installation process and why this is nothing to be scared of! We'll talk about how you can start your first project, where to save it, and how to make sure everything is backed up. Let’s get started!
1. How to Download and Install Unity
First, you just need to go to Unity.com and create a Unity ID. You’ll get a confirmation email, as per usual for setting up an account like this. Once you create your new Unity ID and sign in, go back to the Unity homepage and click “Download Unity for Windows”. Once Unity has been downloaded, open the download!

Now we’ll begin the installation process. Select the Destination folder, you can make a new folder or not, it doesn’t really matter. Click Install.
Once it has been installed, you’ll see the Unity Hub window. Hit Sign In and this is where you’ll enter your new Unity ID that we just created a moment ago. Next, you can install the “Unity Editor” but we’re going to skip this step for now so we can do a few tricks before proceeding with the full installation. The same goes for the “Personal Edition License” prompt (as seen below).
First, open up Preferences (in the top left corner) and from here we’re going to choose a default location that we want our projects to be saved to. Go to “Dev” and then “Unity” and select this folder. Now if you look on the left hand side under “Installs” you’ll see where Installs locations will be found, as well as Downloads location. You can change these or set them to custom folders if you wish. Just refer back to this panel if you ever lose something.
If you click on Appearance on the left hand side, you can check the box that says “Hide the Hub to Windows system tray when Unity Editor opens” - this is a personal preference but we’ve found this to be a helpful way to go.
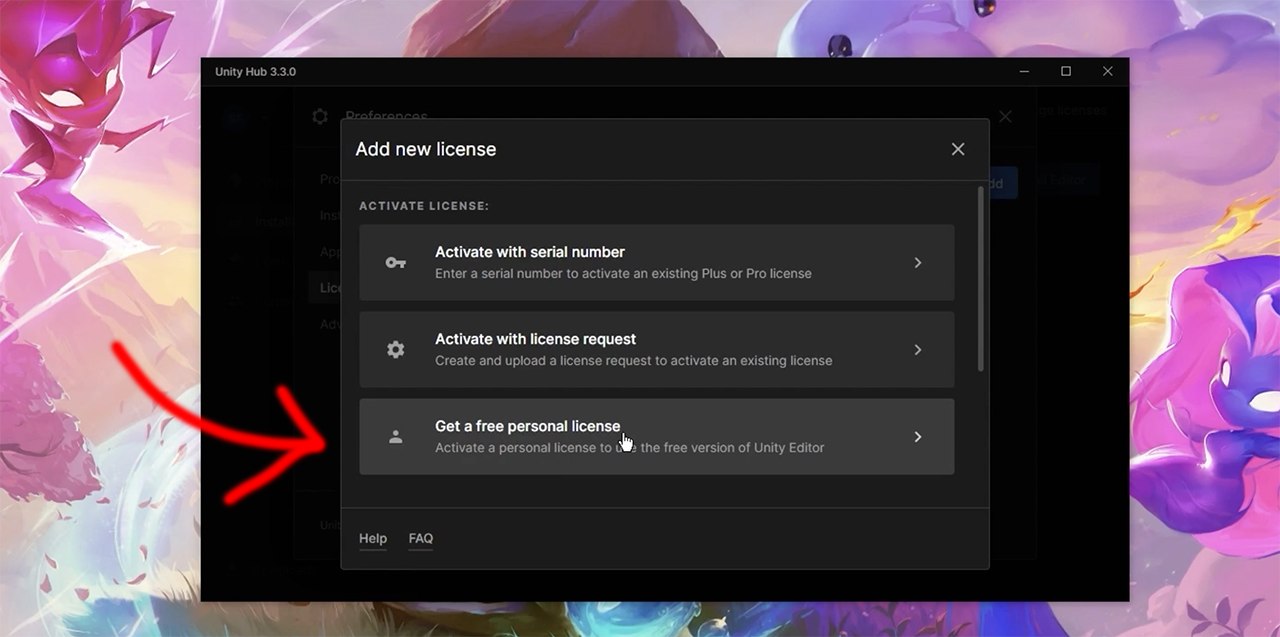
2. Add Your License
Now go to Licenses, this is where we’ll add your License. You’ll see the various options for the license you have, whether you’re a student or if you want a team license. In this tutorial, we’re going to choose “Get a free personal license” - be sure to read the terms and service! Then hit “Agree.” Voila! Our license is ready to go.
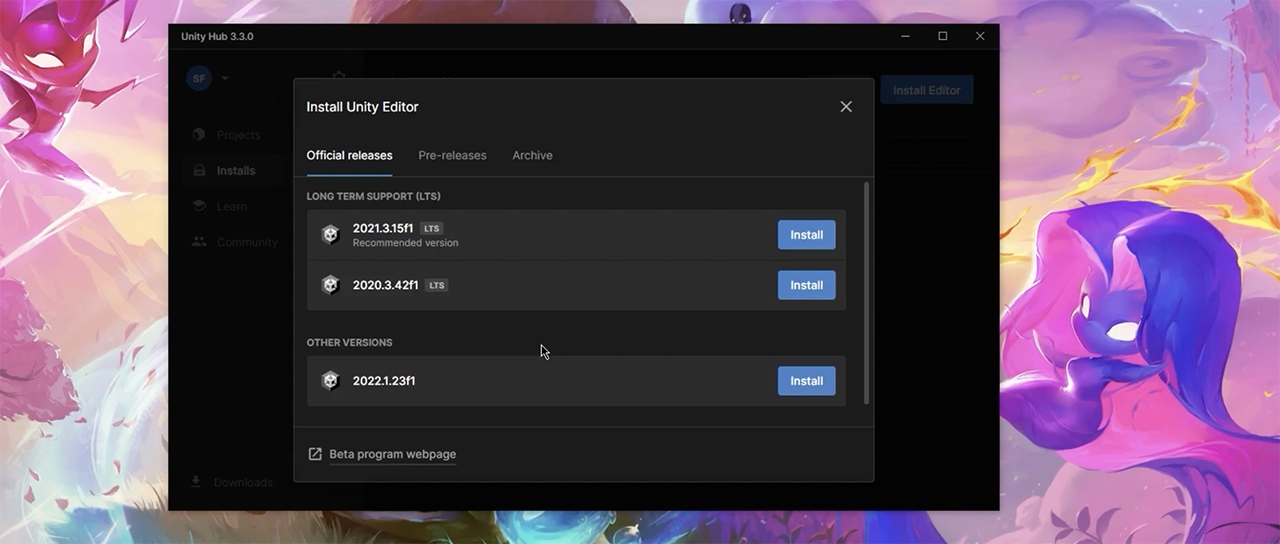
Let’s install our first Editor, go to the Installs tab on the left hand side. Hit “Install Editor” This is where you’ll decide which version of the Editor you’d like to install. We recommend installing the recommended version under “Long Term Support”. So go ahead and hit Install.
3. Install Visual Studio
Now you’ll decide which Modules to add, but don’t worry you can still add these later on. These will build up in terms of storage so be mindful of space! We’re going to add the Documentation module so we can access it in Offline mode.
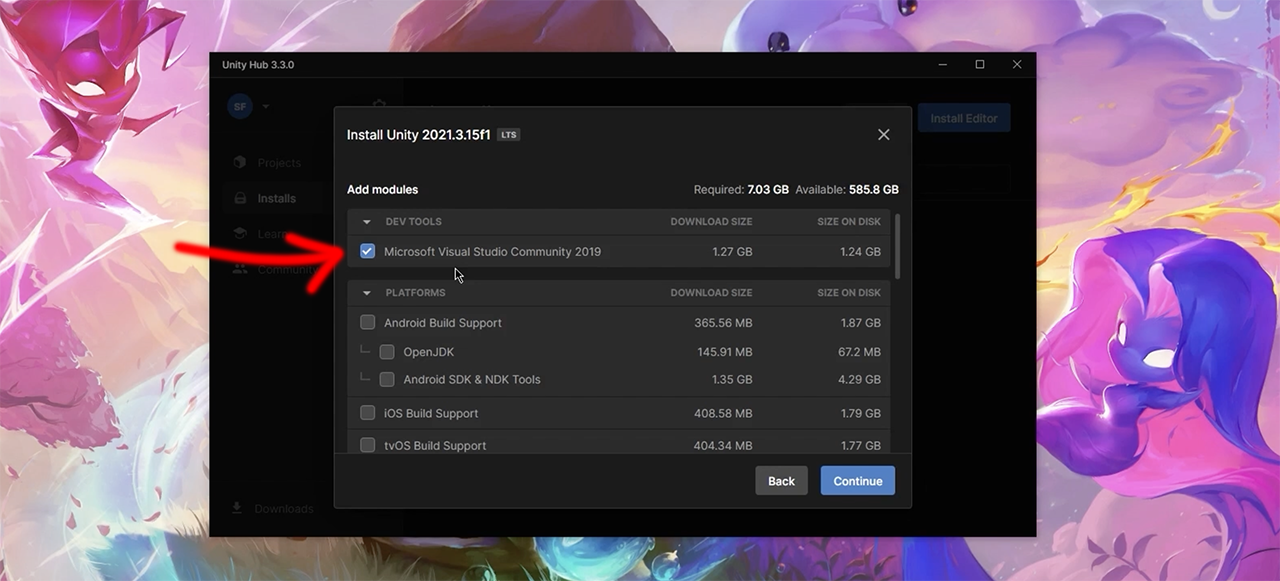
We’re also going to select “Microsoft Visual Studio Community 2019” - this is an ID which is just software that allows you to code faster. Hit Continue and then read the brief terms, then Install.
In the next Window that pops up, under the “Workloads” tab, scroll down and check the box that says “Game development with Unity”. Next, you can change various things under the Individual components, language packs, or installation locations tabs - this part is up to you and you can select or change whatever you want. Once you’ve done this, hit Install. Unity is now installed!
4. Create a New Project
Within your Unity Hub, you’ll see under the “Projects” tab, you have the option to create a new project by hitting the button “New Project”. From here’ you’ll select the template you’d like to use that are templates created by Unity to give you a framework for beginning with the program.
For this example, we’re going to go with the 3D (URP) template. Once you’ve downloaded this template, be sure to name the new project and choose the location for which it will be saved to. Now you can open the project, forewarning - this might take a while since it's the first time we’re opening it. It won’t always take this long!
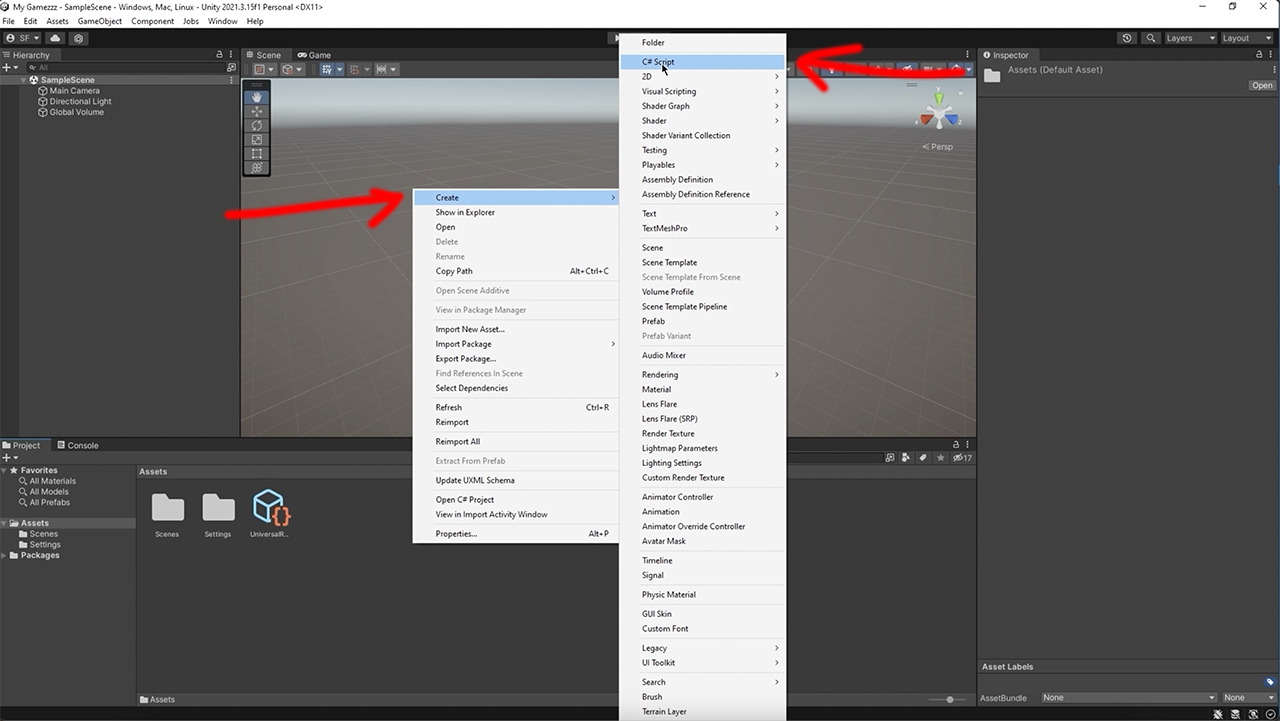
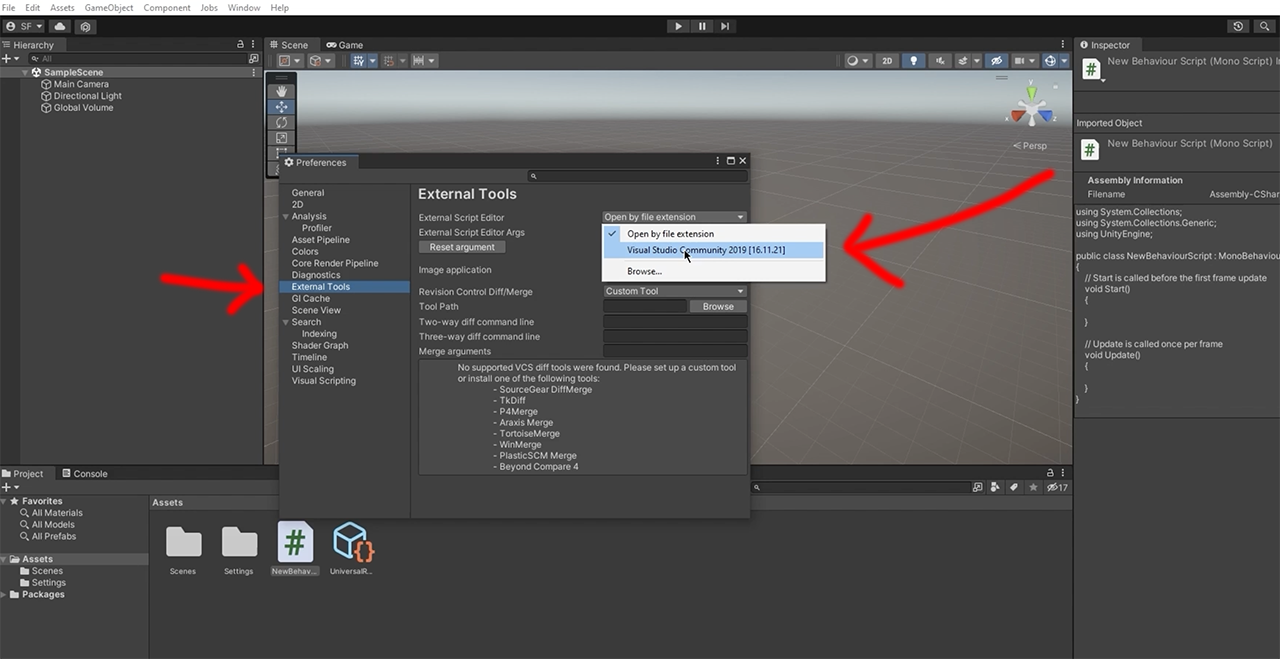
So now that we’re in Unity, we’re going to create a Script (no coding involved!). Right-click in the empty space down under Assets and hit Create > C#Script. Next, go to Edit > Preferences and under External Tools and click “Visual Studio Community 2019” then hit “Regenerate Project Files”. Then we’ll be able to double click our script. This is going to open up Visual Studio, and since this is the first time we’re opening Visual Studio, we’ll need to sign into our account or create an account.
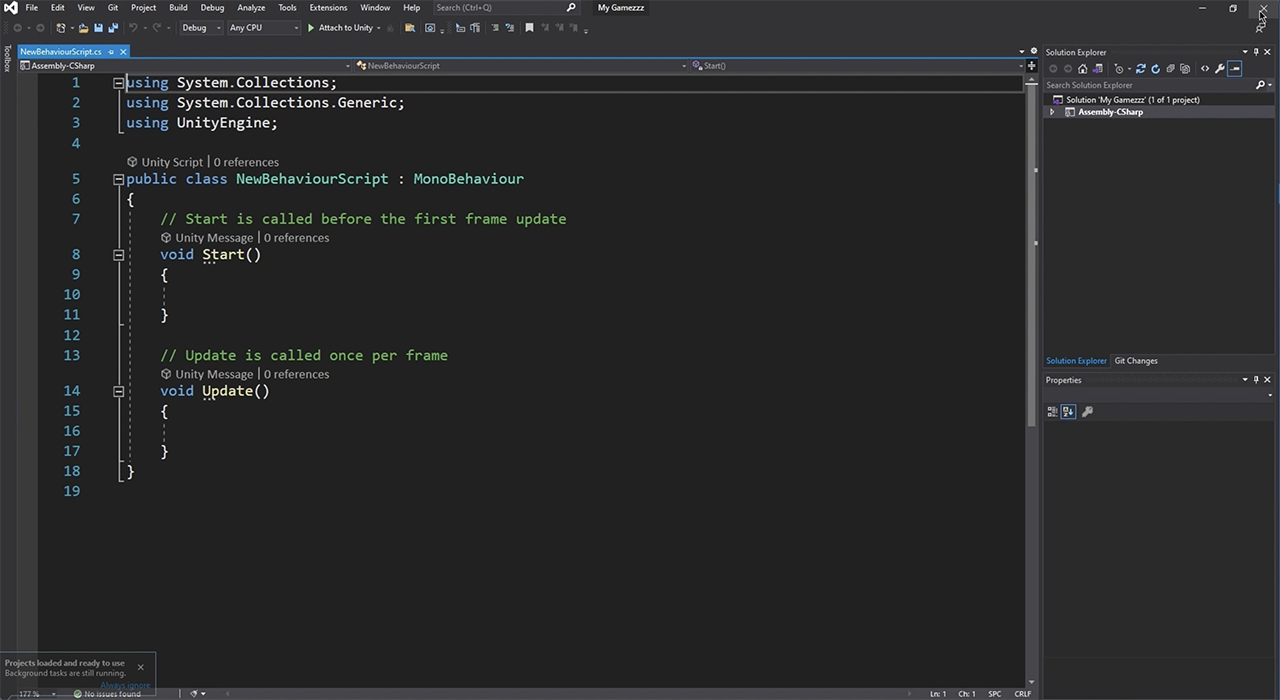
Once Visual Studio opens, look up top at the “Attach to Unity” tab and click. Now we’ll go back to Unity and you’ll see a new Window has popped up! If you are planning on using Visual Studio for the entirety of your project, hit “Enable debugging for all projects” which will prevent us from having to repeat the last few steps within Visual Studio.
So go back to Visual Studio and look up top again, you’ll see a small red square, if you hover over it you’ll see that it is the “Stop debugging” button. Click it! Then you can either close or minimize Visual Studio and open back up Unity.
Now double click the script and we’re ready to rock! We can finally start coding. If you want to know how to open an already-existing project within Unity, be sure to follow along in the tutorial above!
FREE Create VFX in Unity Lesson
Want to tackle creating VFX in the Unity game engine? Learn how to block-in FX with a lesson from Hadidjah Chamberlain. You can stream this in-depth lesson now in our Free VFX Training course, or you can join VFX All Access and stream every Unity lesson.
Start Your VFX Apprenticeship
Begin your journey towards mastering FX for games and animation. Join VFX-A All Access and discover cutting-edge 2D, 3D, and real-time FX training.