Get Started with Niagara Real-time VFX in Unreal Engine
Nov 02, 2022
Dive into Niagara, the next-generation VFX system in Unreal Engine. Let's make a particle system to create video game FX.
Jason Keyser is back and brings us a thorough look at getting started in Niagara, specifically how to create a particle system in Unreal Engine 5. This tutorial was inspired by watching our very own Hadidjah Chamberlin's course on particle animation.
For years FX artists and studios used Cascade in Unreal Engine, but the tide is turning and more and more studios are adopting the Niagara VFX system in their pipelines. So let's take a look at what this means for you.
Here are a few topics and key tools that you can expect to learn from this Unreal tutorial:
- Particle Systems
- Particle Emitter
- Modules
- Shading Modules
- Texture Samples
- Particle Colors
Intro to Niagara FX in Unreal Engine 5
Bonus! If you enjoy this tutorial and want to dive into a bit more with Hadidjah's lessons, there is a free hour-long lesson inside of our Free VFX Training library. You can even download some UE project files to experiment with.
One of the first things to note is that particle systems contain many particle emitters within themselves. Around here we like to explain as if the particle emitter is a garden hose. A particle system contains several garden hoses, if this analogy makes any sense! Then you have modules which would be like settings on the garden hoses themselves. Then you’ve got parameters which are the exact numbers or data that are put into each module. Make sense?
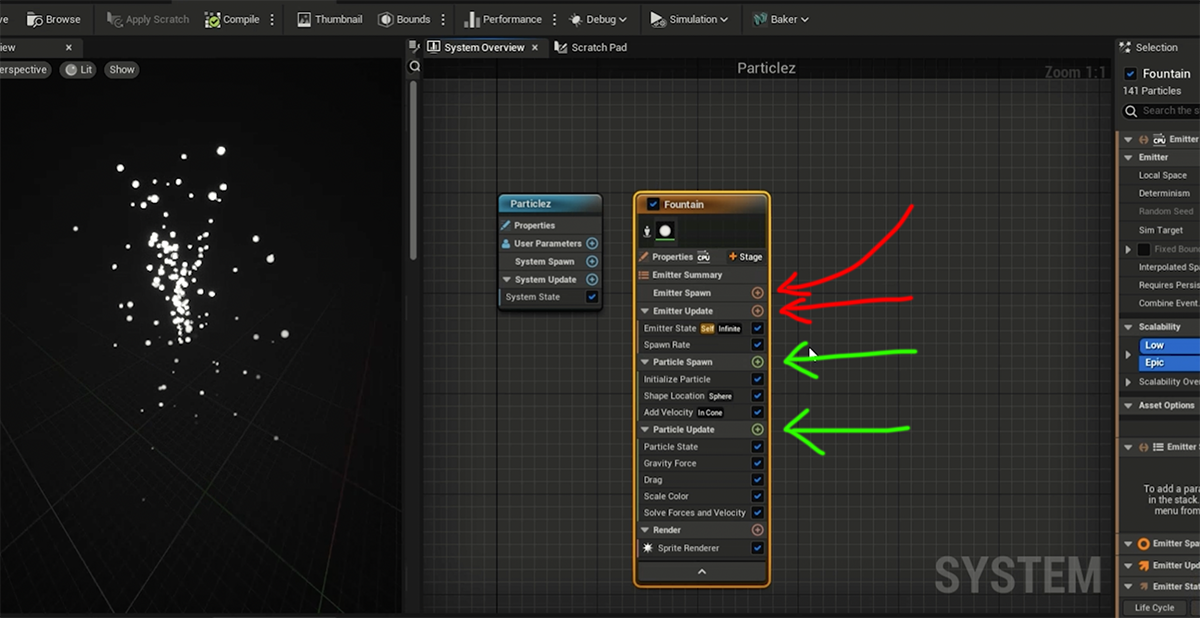
So within your Emitter, you’ll notice that Niagara has color coated certain actions and tools, which makes it all much easier to follow. The red color code is anything that relates to the emitter, whereas the green color code is anything that relates to particles.
Let’s play with some modules to see what they do. First, we can see by choosing Spawn Rate and changing the Spawn Rate down to 4 there will be a significant reduction in Particles. From here, you can play around with the different Modules like Sprite Attributes and really just start changing the size, or the Parameter, of anything and everything. Part of being an FX artist is just playing around within the software and seeing what you end up creating!
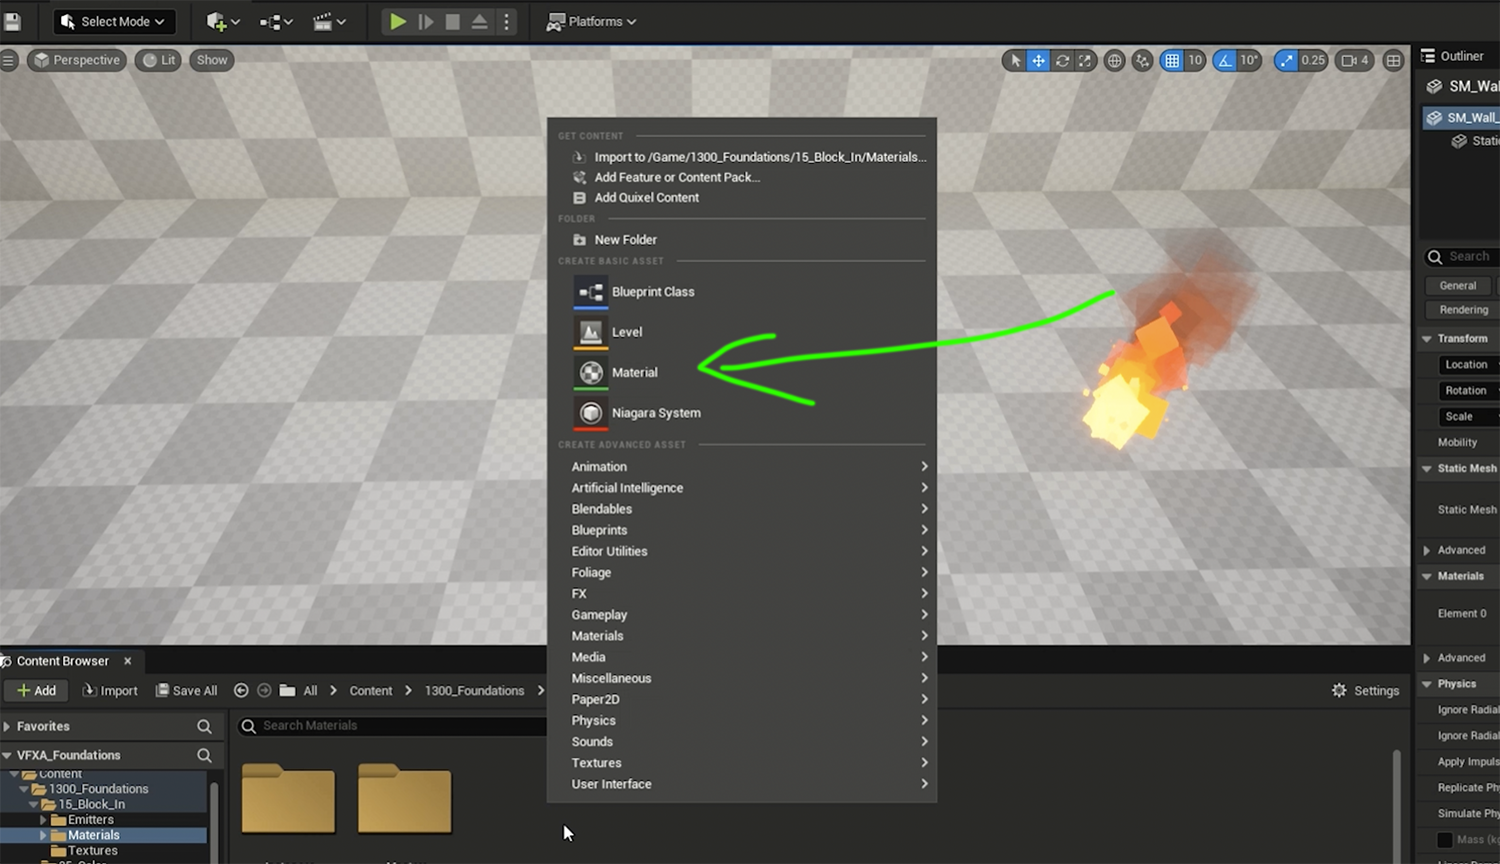
Learning About Materials
Just remember, if you find yourself getting overwhelmed and even lost, just take some time to get re-oriented until you feel comfortable with the interface. That’s one of the biggest steps you can take on this journey.
Now, it's important to know that the material is the particle itself. So, think of it as a clear plastic card - you want to think of the material as whatever is displayed on that card and then you throw it in the air and now you have a moving particle.
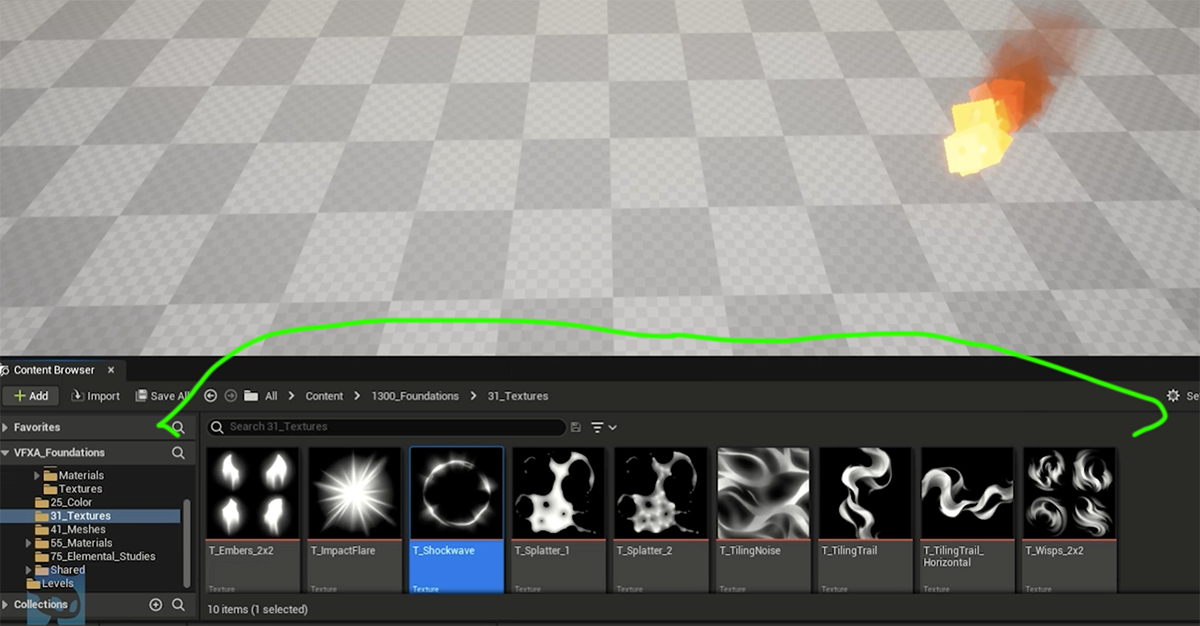
As you can see in the image above, good textures are everything. The textures shown above were created by our very own Ali Sorensen in our Texture Painting course. A really well painted texture can carry a particle system. It really is an extremely valuable asset to have.
Side note. One great feature about Unreal is that if you place your mouse over something, you’ll get a description of what that tool or action does. It's a great way to learn while you work! So go over to the Blend Mode and change it from Opaque to Translucent.
Then I’ll change the Shading Module from Default List to Unlit. Next, you’ll right click in the open space and choose Particle Color (this is a critical step). Then you’ll hold the key “T” on your keyboard and left click on the open space, you’ll see the box “Texture Sample” will pop up.
If you go back to the Browser, you can choose a Texture that we’ve provided in the link below (from one of our classes). I’ll say again, a well painted texture can carry a particle system. It really will help make the whole particle system look amazing.
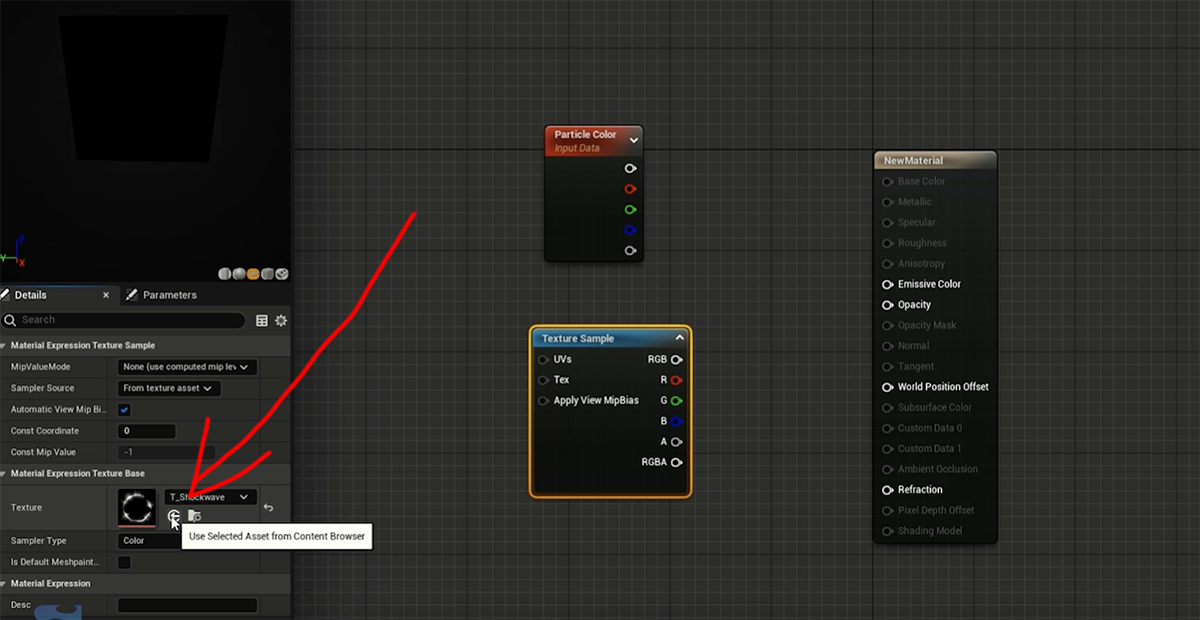
Once you have the texture selected in your browser, go back and click the “Over” arrow that plops the texture right in. I’ve included a screenshot above so you know where this arrow is located.
Next we need a Multiply Node so just hold the letter “M” and then left click. Then we’ll pick our color so we’ll drag the color from Particle Color down to Emissive Color. After this, we’ll drag the transparent color (acting as the Alpha) down to the A on our Multiply Node.
From here, we can choose any of the “R, G, B,” from the Texture Sample and drag it onto B on our Multiply Node. Now drag the Multiply Node over to the Opacity option under your New Material node. Now you’ve got a nice, transparent, bursting particle effect. Don’t forget to save your material!
Animating the Particle
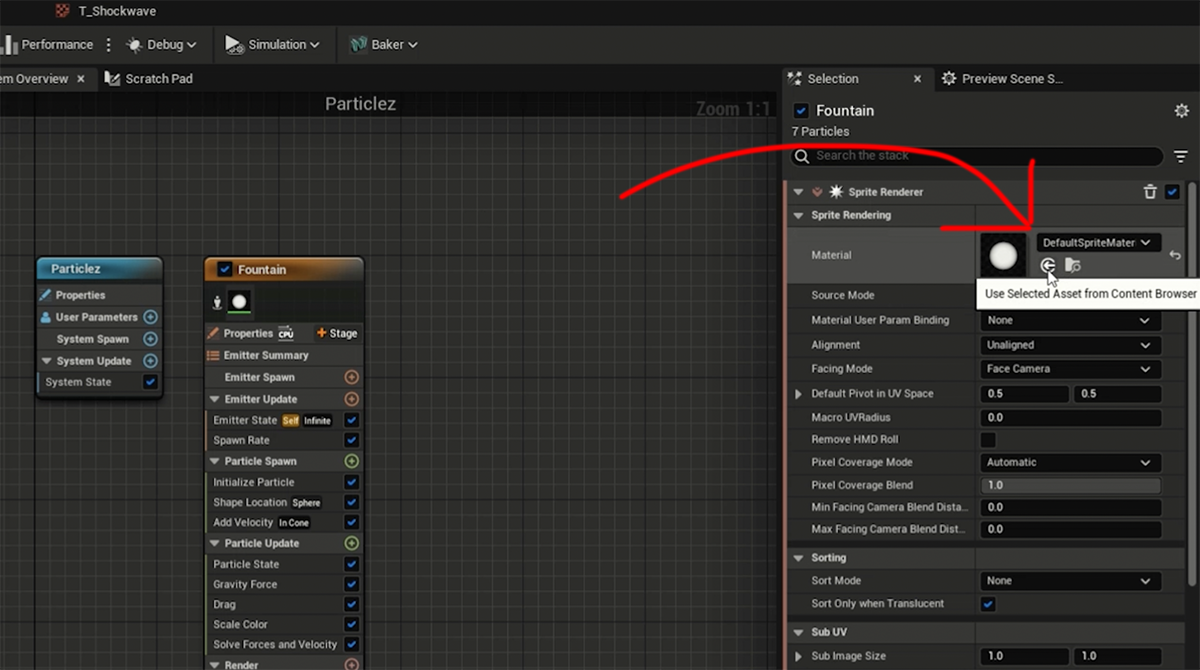
Next we’re going to animate the particle we just created. Go to the Browse tab, find your new material down at the bottom. Go back to your Particles tab and hit the button in the top right corner. When you hover over it says “Use Selected Asset from Content Browser” and just click it! You’ll see the particle system uploaded and it's animated!
From here, you’ll want to tweak this animation and make sure every aspect of the animation is moving correctly and not seeming robotic. It needs to look fluid, if that makes sense.
Hope this helps you begin your journey diving into Niagara in Unreal Engine! Again, check out our free training page to watch Hadidjah's block-in lesson and download the accompanying project files.

Want to dive into professional game dev and animation workflows? Now that you have the basics of Niagara, get ready to go past the tools and learn the creative skills that FX artists around the world use to make effects in games, film, and television. VFX Apprentice courses are here to show you the way.
Our roster of instructors will teach you how to create original stylized FX, art fundamentals, and proper workflows to get you up to speed and ready to land a dream job with a studio or creative house.
Start Your VFX Apprenticeship
Begin your journey towards mastering FX for games and animation. Join VFX-A All Access and discover cutting-edge 2D, 3D, and real-time FX training.